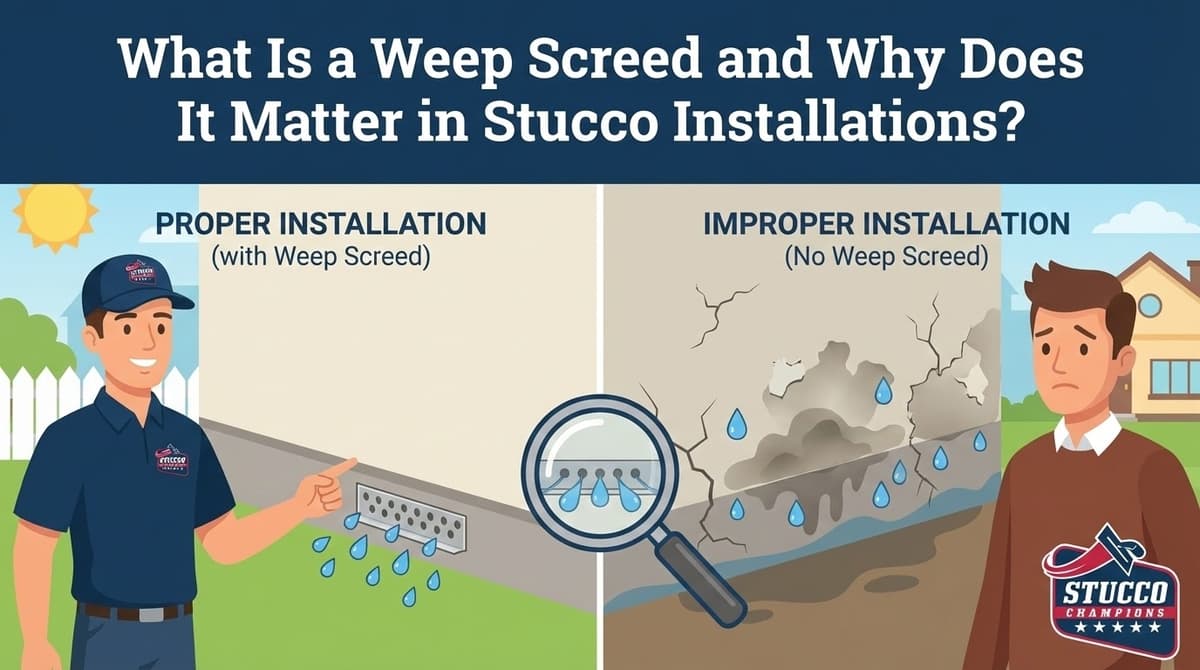
What Is a Weep Screed and Why Does It Matter in Stucco Installations?
Written by Stucco Champions — Southern California’s Authority on Exterior Plastering.
What Is a Weep Screed? The Critical Drainage Component Explained
When planning a stucco project, most homeowners focus on the finish texture and the color. However, the most important component of your exterior wall is one you barely notice: the Weep Screed.
This simple piece of galvanized steel flashing is the primary exit door for moisture in your wall system. It is required by code (IBC and ASTM C1063) for a reason. Without it, trapped water has nowhere to go but into your framing, causing silent, catastrophic dry rot. This guide explains the mechanics of the weep screed and why it is non-negotiable.
Not sure if your home has a weep screed? Our free Weep Screed Assessment walks you through it in 2 minutes.1. The Physics: Stucco acts as a Reservoir
To understand the weep screed, you must understand stucco. Stucco is not waterproof; it is water-resistant. It absorbs rain like a sponge.
Gravity pulls this absorbed moisture down through the cement until it hits the waterproof building paper. It then runs down the paper to the bottom of the wall.
The Function: The weep screed catches this water and directs it out through small holes in the bottom flange, allowing it to drip harmlessly onto the foundation.
Free Assessment
Noticing Stucco Damage?
Get a free on-site assessment from a licensed contractor. $0 deposit, no obligation.
GET FREE ASSESSMENT2. Code Requirements: The 4-Inch Rule
Installing a weep screed isn't enough; it must be placed correctly. California code dictates strict clearances to prevent "wicking" (moisture traveling up from the ground).
Mandatory Clearances- Earth/Soil: The screed must be at least 4 inches above the dirt.
- Paved Surfaces: The screed must be at least 2 inches above concrete or pavers.
Why? If the screed touches the ground, the holes get clogged. Worse, the stucco acts like a wick, pulling ground moisture up into the wall, bypassing the drainage system entirely.
3. Identifying Your Weep Screed
Go outside and look at the bottom edge of your stucco, where it meets the concrete foundation.
- If you see a metal strip: Look for small holes or slots in the bottom edge. This is a proper weep screed (usually a #7 Foundation Screed).
- If the stucco goes into the dirt: Your home likely lacks a weep screed (common in pre-1970s builds). This is a high-risk condition for termite entry and rot.
4. The "Buried" Screed Problem
The most common failure we see is not a missing screed, but a buried one.
Over years of landscaping, mulch and soil build up against the house, covering the weep holes.
The Consequence: Water trapped behind the wall cannot exit. It pools at the mudsill (bottom plate), rotting the wood structure and creating a perfect environment for mold.
We often see homeowners caulk the gap between the metal screed and the foundation to "seal the house." Do not do this. You are sealing the water in. That gap is the drain.
5. Retrofitting: Can You Add One?
If your home lacks a weep screed, or if it is rusted out, it can be retrofitted.
The Process: We cut the bottom 6-8 inches of stucco off the wall to expose the framing. We install a new screed, integrate new waterproofing paper (shingle-lapped under the existing paper), and patch the area. This restores the drainage plane and protects the foundation.
Conclusion: Respect the Drain
The weep screed is the unsung hero of the building envelope. It works silently to keep your framing dry. By maintaining proper ground clearance and ensuring the holes remain open, you ensure your stucco system functions as designed for decades.
Concerned About Your Weep Screed?
Our free visual self-check walks you through the key warning signs in just 2 minutes.
Frequently Asked Questions About Stucco
How much does stucco repair cost in Orange County and Los Angeles?+
Stucco repair typically ranges from $500 for minor crack patching to $5,000+ for full re-stucco of a single elevation. The exact cost depends on the damage type (hairline cracks, water damage, delamination, weep screed failure), the square footage involved, and whether the original three-coat or one-coat stucco system needs to be matched. Stucco Champions provides fixed-price written estimates after a free on-site assessment — no hourly billing, no surprise change orders. See our stucco repair cost guide for detailed pricing by repair type.
How long does stucco last in Southern California?+
Properly installed three-coat stucco lasts 50-80+ years in Southern California's climate. The most common failure points aren't the stucco itself — they're the supporting components: corroded weep screed, deteriorated building paper behind the stucco, and improperly sealed window flashing. Most "stucco failures" are actually moisture-intrusion failures that start at one of these points. Annual visual inspection catches problems before they spread, which is why we offer free weep screed assessments for homeowners in our service area.
Can I repair stucco myself, or do I need a contractor?+
Hairline cracks under 1/8 inch wide can be sealed with elastomeric caulk by a homeowner. Anything larger — pattern cracks, delamination (where stucco pulls away from the wall), water-damaged areas, or chimney/window leak repairs — requires a licensed contractor. Improper DIY repair on these is the #1 cause of repeat failures because the underlying cause (usually moisture) isn't addressed. California's CSLB requires a license for any stucco work over $500. We're a CSLB-licensed and insured contractor — see our contractor team for credentials.
How do I know if I need stucco repair vs. full re-stucco?+
If less than 30% of an elevation has visible damage, repair is the right call. If you see large areas of cracking, multiple zones of delamination, or the underlying paper and lath have rotted across an entire wall, full re-stucco of that elevation is more cost-effective long-term. Our free assessment includes a moisture survey and lath inspection so you get a defensible recommendation either way — not just a quote pushing whichever option costs more.
Do you offer warranties on stucco work?+
Yes. Stucco Champions provides a written 5-year workmanship warranty on all stucco repairs and a 10-year warranty on full re-stucco. We're a CSLB-licensed and insured contractor (license #1122006 — verifiable at cslb.ca.gov), which means our work is backed by California's contractor licensing board, not just our own promise. Request a free estimate to see the warranty terms in writing before you sign anything.
How long does a stucco repair take?+
Most patch repairs are completed in 1-2 days, including a 24-hour cure time before texture matching and color application. Full re-stucco of a single elevation runs 5-7 working days because each coat (scratch, brown, finish) needs to cure properly before the next is applied. We schedule around weather — California stucco needs daytime temperatures above 50°F with no rain forecast for at least 24 hours after each coat. Our crew shows up on time, every time.