Stucco Scratch Coat vs Brown Coat: A Comprehensive Guide
Written by Stucco Champions — Southern California’s Authority on Exterior Plastering.
A Technical Comparison: Stucco Scratch Coat vs. Brown Coat
In the construction industry, the integrity of a Three-Coat Stucco System relies on the symbiotic relationship between its two base layers. While homeowners focus on the final texture, the longevity of the wall is determined by what lies beneath.
To the untrained eye, the Scratch Coat and the Brown Coat look like "just cement." However, they have distinct chemical functions, application thicknesses, and texturing requirements defined by ASTM C926. This guide breaks down the engineering behind the base coats.
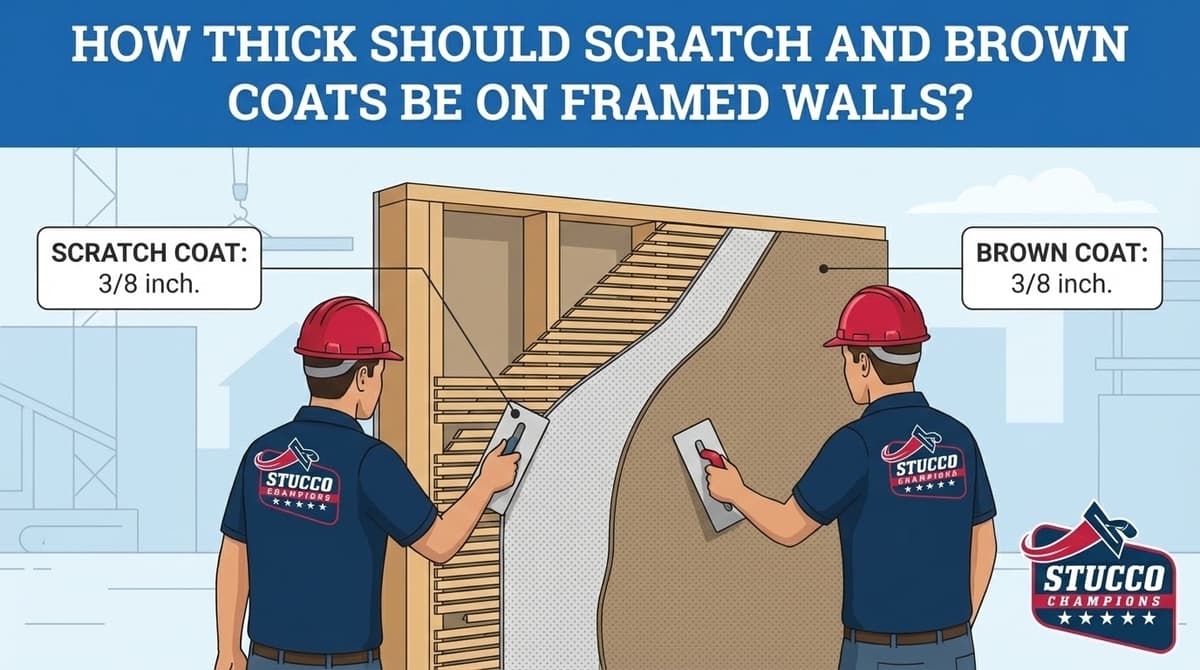
1. The Scratch Coat: "The Anchor"
The first layer applied to the wall is the Scratch Coat.
Primary Function: Adhesion and Embedment.
Thickness: Nominal 3/8 inch.
Free Assessment
Noticing Stucco Damage?
Get a free on-site assessment from a licensed contractor. $0 deposit, no obligation.
GET FREE ASSESSMENTApplication Protocol
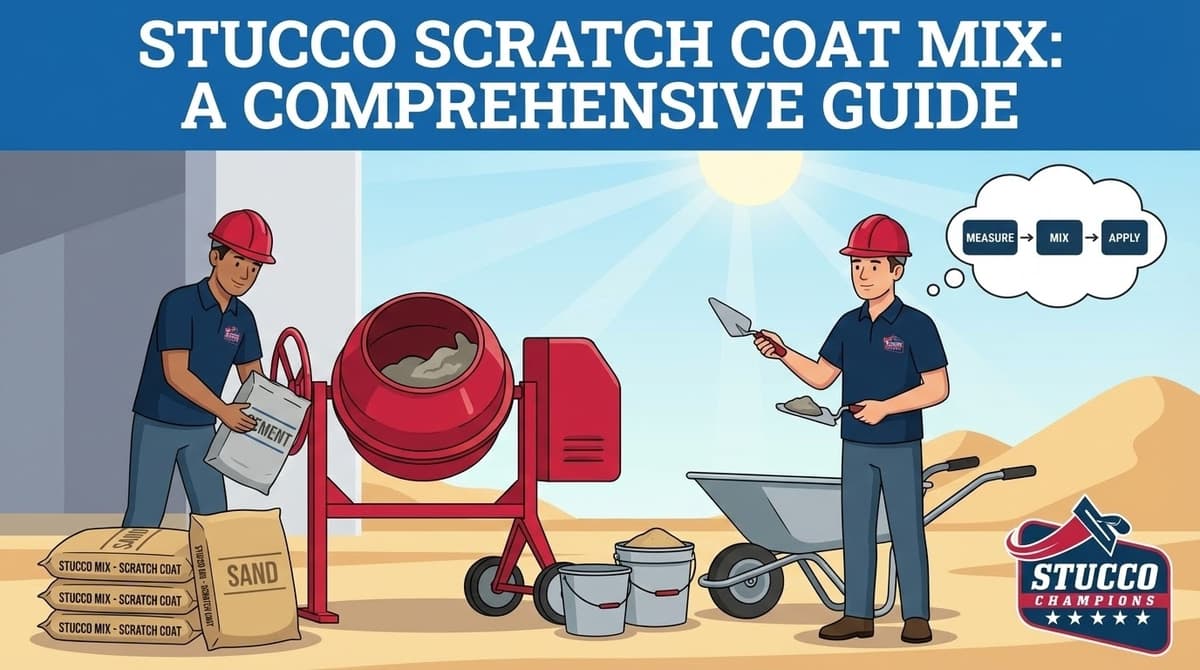
The mix (1 part cement to 3 parts sand) is applied with heavy pressure to force the material through the galvanized wire lath. The goal is to encase the wire completely, protecting it from rust and keying it into the building paper behind.
Why it's called "Scratch": While the cement is still wet, we use a scarifier (a metal rake) to cut horizontal grooves into the surface.
[Image of stucco wall layers cross section]
These grooves provide a mechanical "key" or grip for the next layer to lock into.
2. The Brown Coat: "The Leveler"
The second layer is the Brown Coat.
Primary Function: Straightening and Flattening.
Thickness: Nominal 3/8 inch.
Application Protocol
Because the scratch coat follows the wavy contours of the wood framing, the wall is not yet straight. The Brown Coat builds up the thickness (to a total of 3/4" combined). We use long straightedges called "Darbies" and "Rods" to shave the wall flat and plumb, correcting any framing imperfections.
The "Float" Finish
Unlike the grooved scratch coat, the brown coat is finished with a Green Sponge Float or hard rubber float. This opens the pores of the cement, creating a uniform, sandpaper-like surface. This porosity ensures the final Color Coat dries evenly without blotching.
3. The Critical Difference: Curing Times
You cannot rush the chemistry. Cement cures by hydration (water retention).
- Scratch Coat Cure: Must be kept moist for a minimum of 48 hours before applying the brown coat.
- Brown Coat Cure: Ideally, this layer should cure for 7 to 14 days before the color coat is applied.
Why wait? As the brown coat cures, it shrinks. By waiting 14 days, we allow the majority of the shrinkage cracking to occur before we apply the finish. If you rush and apply the color coat on day 3, those shrinkage cracks will telegraph right through the finish.
Conclusion: Two Coats, One System
The Scratch Coat grabs the house; the Brown Coat flattens the wall. Together, they form the 7/8" thick rock shell that protects your home from fire and impact. Skipping a step or merging these layers (a "double-back" shortcut) compromises the structural integrity of the system.
Related Resources
Last week, we shared Scratch Coat Stucco Guide: Purpose and Mix. Dive deeper into the specific mix ratios for the first layer.
Frequently Asked Questions About Stucco
How much does stucco repair cost in Orange County and Los Angeles?+
Stucco repair typically ranges from $500 for minor crack patching to $5,000+ for full re-stucco of a single elevation. The exact cost depends on the damage type (hairline cracks, water damage, delamination, weep screed failure), the square footage involved, and whether the original three-coat or one-coat stucco system needs to be matched. Stucco Champions provides fixed-price written estimates after a free on-site assessment — no hourly billing, no surprise change orders. See our stucco repair cost guide for detailed pricing by repair type.
How long does stucco last in Southern California?+
Properly installed three-coat stucco lasts 50-80+ years in Southern California's climate. The most common failure points aren't the stucco itself — they're the supporting components: corroded weep screed, deteriorated building paper behind the stucco, and improperly sealed window flashing. Most "stucco failures" are actually moisture-intrusion failures that start at one of these points. Annual visual inspection catches problems before they spread, which is why we offer free weep screed assessments for homeowners in our service area.
Can I repair stucco myself, or do I need a contractor?+
Hairline cracks under 1/8 inch wide can be sealed with elastomeric caulk by a homeowner. Anything larger — pattern cracks, delamination (where stucco pulls away from the wall), water-damaged areas, or chimney/window leak repairs — requires a licensed contractor. Improper DIY repair on these is the #1 cause of repeat failures because the underlying cause (usually moisture) isn't addressed. California's CSLB requires a license for any stucco work over $500. We're a CSLB-licensed and insured contractor — see our contractor team for credentials.
How do I know if I need stucco repair vs. full re-stucco?+
If less than 30% of an elevation has visible damage, repair is the right call. If you see large areas of cracking, multiple zones of delamination, or the underlying paper and lath have rotted across an entire wall, full re-stucco of that elevation is more cost-effective long-term. Our free assessment includes a moisture survey and lath inspection so you get a defensible recommendation either way — not just a quote pushing whichever option costs more.
Do you offer warranties on stucco work?+
Yes. Stucco Champions provides a written 5-year workmanship warranty on all stucco repairs and a 10-year warranty on full re-stucco. We're a CSLB-licensed and insured contractor (license #1122006 — verifiable at cslb.ca.gov), which means our work is backed by California's contractor licensing board, not just our own promise. Request a free estimate to see the warranty terms in writing before you sign anything.
How long does a stucco repair take?+
Most patch repairs are completed in 1-2 days, including a 24-hour cure time before texture matching and color application. Full re-stucco of a single elevation runs 5-7 working days because each coat (scratch, brown, finish) needs to cure properly before the next is applied. We schedule around weather — California stucco needs daytime temperatures above 50°F with no rain forecast for at least 24 hours after each coat. Our crew shows up on time, every time.